How we generate defect images, and how we label every one
Visynex turns one photograph of a defect-free part into labelled images of that part with defects on it. The defects come from how the part is made. The labels come from a separate check, not from the generator.
Five steps
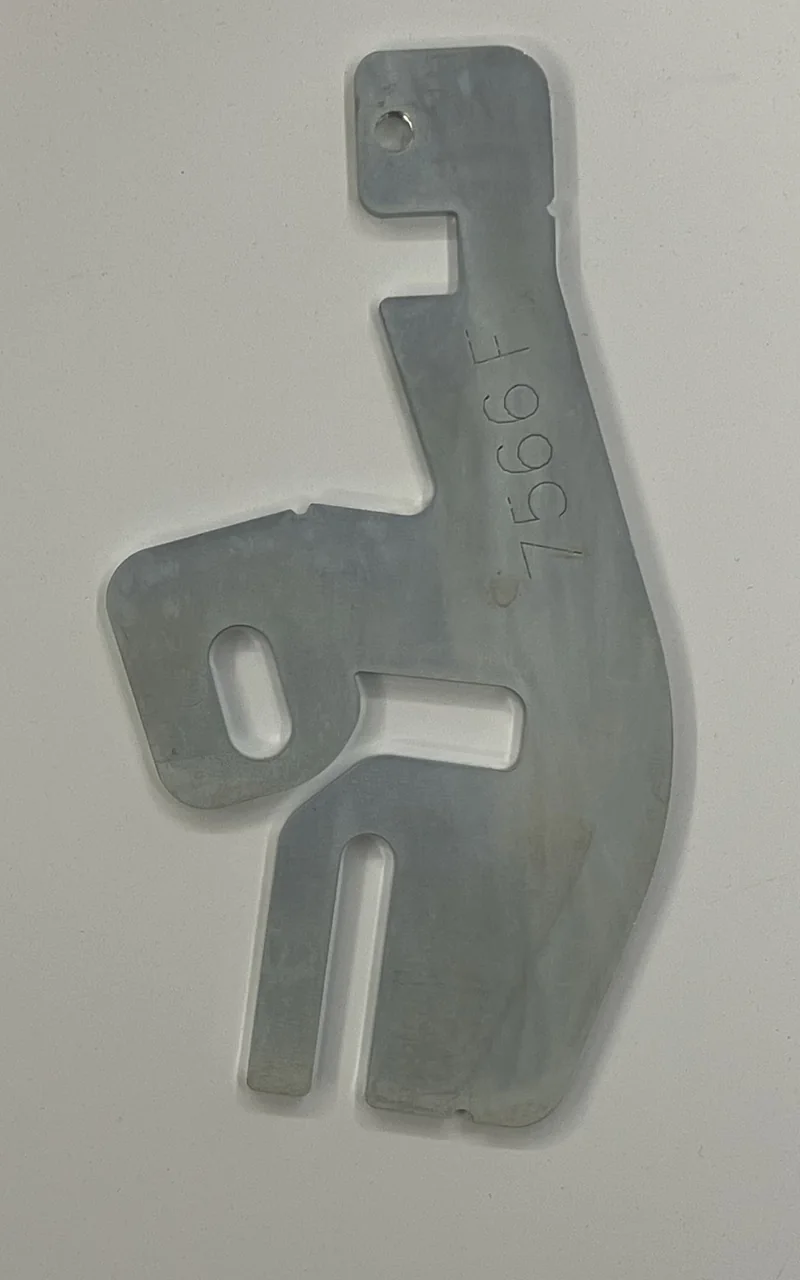
golden_bracket.jpeg · 1349 × 2244
01Photograph one good part.
Use the camera and lighting from your line if you can. That photograph is the reference every defect image is made from, and the one the second pass compares it with.
VisynexA flat bracket cut from sheet, with a marked part number. I can’t tell from a photo how it was cut. How is it made, and what do you reject?
Engineerlaser cut, stainless. we reject for dross on the edges, heat tint, scratches
- Part
- Flat bracket 7566F
- Process
- Laser cut stated
02Tell us how it’s made.
The process decides which defects are physically possible. A laser-cut edge can carry dross; a casting can carry porosity; neither carries the other.
Class Why Dross adhesion molten metal set on the cut HAZ discoloration heat tint beside the cut Edge roughness striations from the beam Kerf deviation cut drifts from the drawing Surface scratch handling, on the flat faces Kerf deviation is dimensional, so a photo may not show it. The check decides.
Engineer add porosity? Visynex I’d leave porosity out: it’s a casting defect, and sheet metal can’t produce it.
5 classes03Review the defect classes.
We propose classes from your process and your photograph, each with a one-line reason. You remove what doesn’t apply and approve the rest.
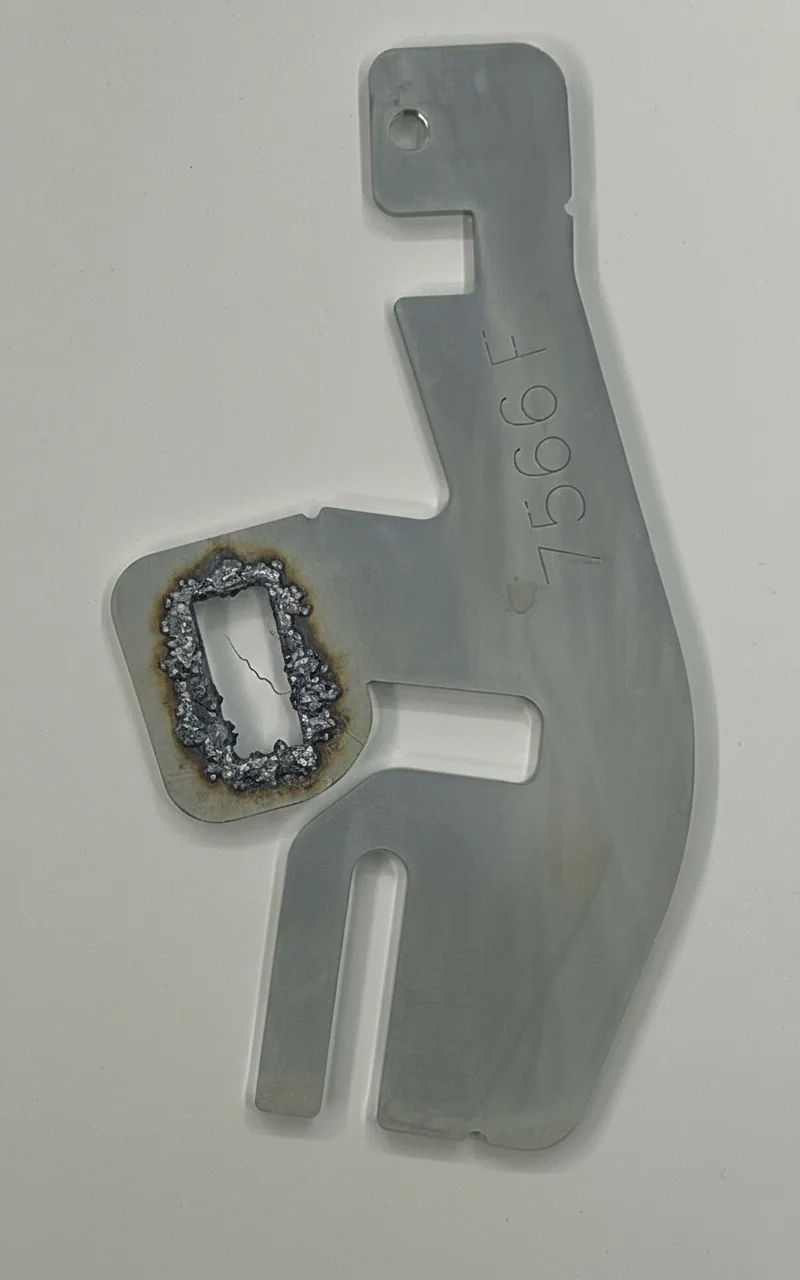
0006_dross_adhesion.png
04Generate.
Each image places one defect of an approved class on your part. It takes about a minute per image, and some are made more than once before one passes the check, so a 60-image set takes about 1.2 to 2.8 hours.
05Detect, then label.
A second pass is told which defect to look for and shown your clean part for comparison, but never told where the defect was placed. It has to find the defect itself. Its box becomes your label, in YOLO and COCO formats.
Some things a photograph can’t settle
How an edge was cut, whether a finish is hard anodise or soft, what alloy it is. When it matters, we ask.
Each class is placed only where it physically occurs on your part: dross on cut edges, not on flat faces. You choose how severe the defects should be, from light to severe. Light defects are the ones inspection most often misses. Generation runs at about one image a minute, and some images are made more than once before one passes the check, so a 60-image set takes about 1.2 to 2.8 hours of generation and a 500-image set about 10 to 23 hours.
The check that decides what ships
Every defect image goes to a separate detection pass. It is given three things: the generated image, your clean reference photograph for comparison, and the name of the defect to look for. It is never told where the defect was placed. It has to find the defect on its own.
An image is discarded if
- the detector can’t find the defect;
- it finds something but isn’t confident (below 0.5 on its own scale);
- what it finds isn’t on the part (on the background, say).
A discarded image is replaced, at our cost. If a class comes up short, we refill it at no extra charge. If anything is still missing after that, the difference is credited to your next order.
If the defect landed somewhere other than where it was placed, the image is kept and labelled where the defect actually is. The detector’s box is the label, never the placement.
What this check is not. The detector is the same family of model as the generator, run separately. It looks only for the defect you ordered, and doesn’t check the rest of the image for other changes. It is a strong filter, not a proof. A wrong box can occasionally get through, which is why every defect image ships with its box drawn where you can see it. Why we label this way →
What you receive
One download. Orders can also include defect-free images of your part.
Defect-free images are delivered without that check, because there’s no defect to confirm. Their YOLO label file is empty, which is how YOLO marks an image with nothing in it.
dataset.zip
images/the images of your partlabels/a YOLO label file for each imageclasses.txtthe class names, in id ordercoco_annotations.jsonthe same boxes, in COCO formatREADME.mdwhat’s in the set, by class
What it won’t do
That’s the whole process. The next step is your part.
Try it on your own part
Sign in with your work email, upload one photograph of a good part, and get up to 10 images of it back, labelled in YOLO and COCO. Each takes about a minute. Free, once per email address.
Try it freeTalk to an engineer
Thirty minutes with someone who built the pipeline. No upload, no account.
Book a call